WooCommerce – Битрикс24 CRM – Интеграция
Бессрочная лицензия на 1 сайт, 6 месяцев поддержки и обновлений (продление поддержки и обновлений на 1 год - 1000 руб.)
Уважаемые клиенты, обратите внимание!
К сожалению, консультации и поддержка по продуктам не осуществляются по телефону. Консультации и поддержка по продуктам осуществляются по следующим каналам связи: заказ консультации через ссылку выше, почта envato@itgalaxy.company.Шаг 1 – Установка
WordPress административная панель:
- Перейдите `Плагины` -> `Добавить новый`.
- Нажмите `Загрузить плагин`.
- Загрузите `WooCommerce – Bitrix24 – Интеграция` zip файл.
- Активируйте, после того, как загрузка завершится.
Загрузка вручную – FTP, SSH, SFTP etc:
- Распакуйте `WooCommerce – Bitrix24 – Интеграция` zip файл.
- Загрузите распакованную папку в `WordPress` папку с плагинами (обычно `/wp-content/plugins`).
- Перейдите `Административная панель` -> `Плагины` и активируйте его.
Шаг 2 – Настройки в CRM
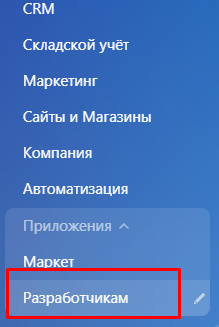
Перейдите в ваш `Bitrix24` -> `Разработчикам`. https://your_bitrix24/devops/
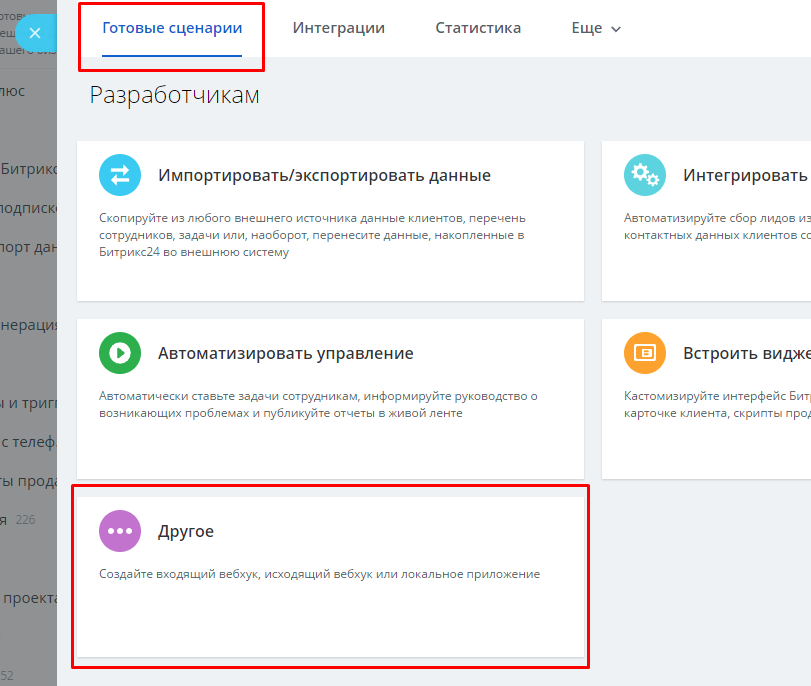
Нажмите `Другое` на вкладке `Готовые сценарии`.
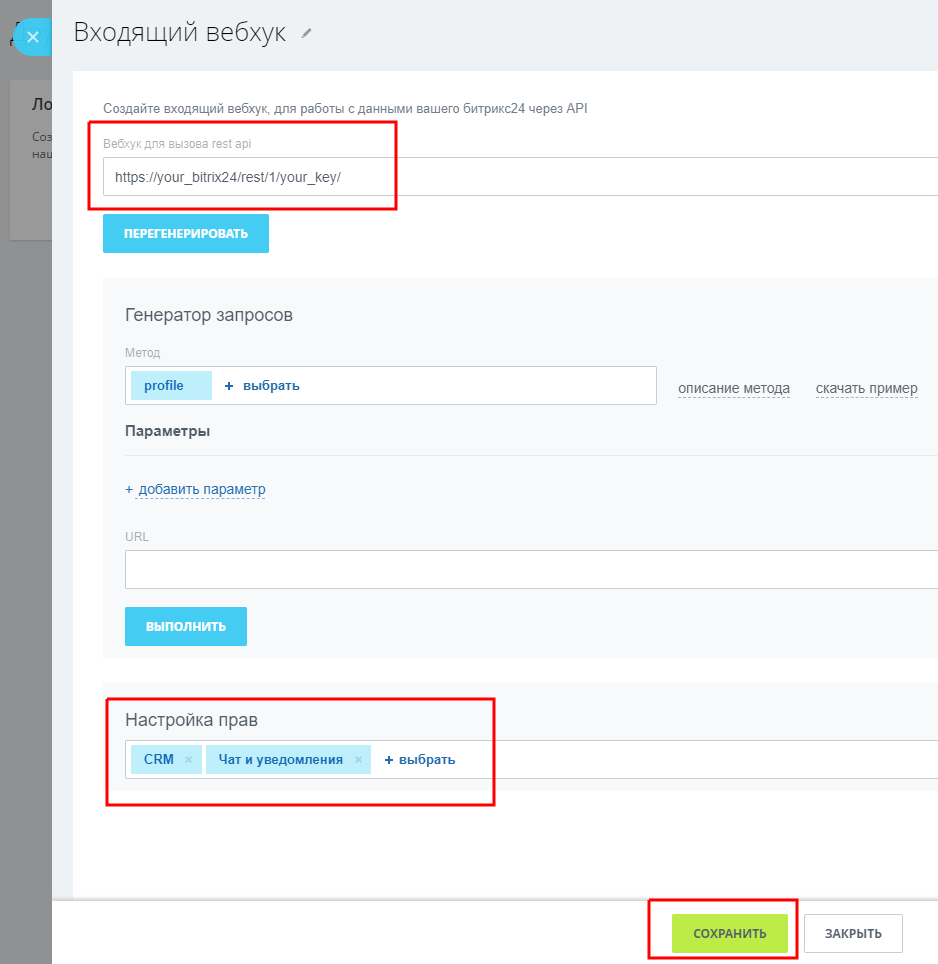
Нажмите `Входящий вебхук`.
Скопируйте значение из поля `Вебхук для вызова REST API`.
Выберите права `CRM` и `Чат и уведомления`.
Нажмите `СОХРАНИТЬ`.
Шаг 3 – Настройки интеграции c CRM
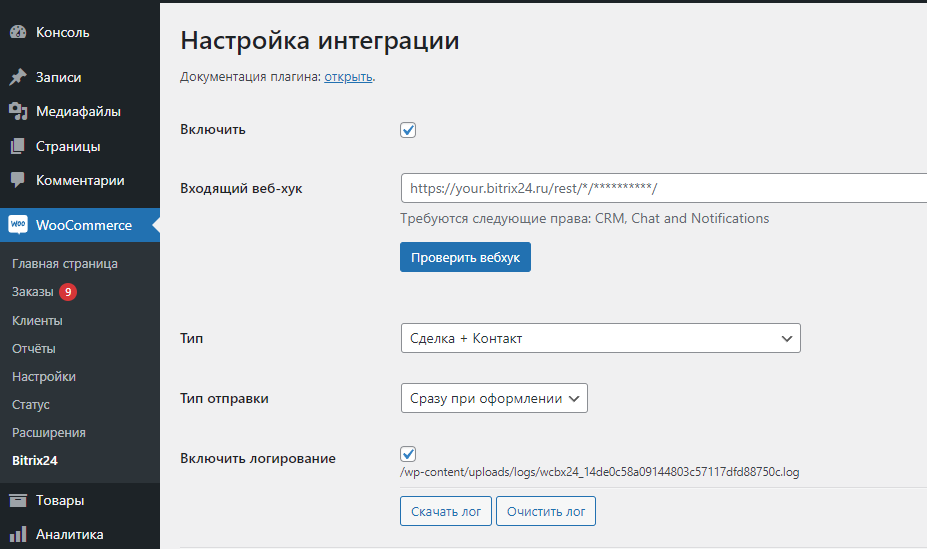
Перейдите WooСommerce -> Bitrix24.
Вставьте в поле `Входящий веб-хук` скопированное значение и нажмите `Проверить вебхук`.
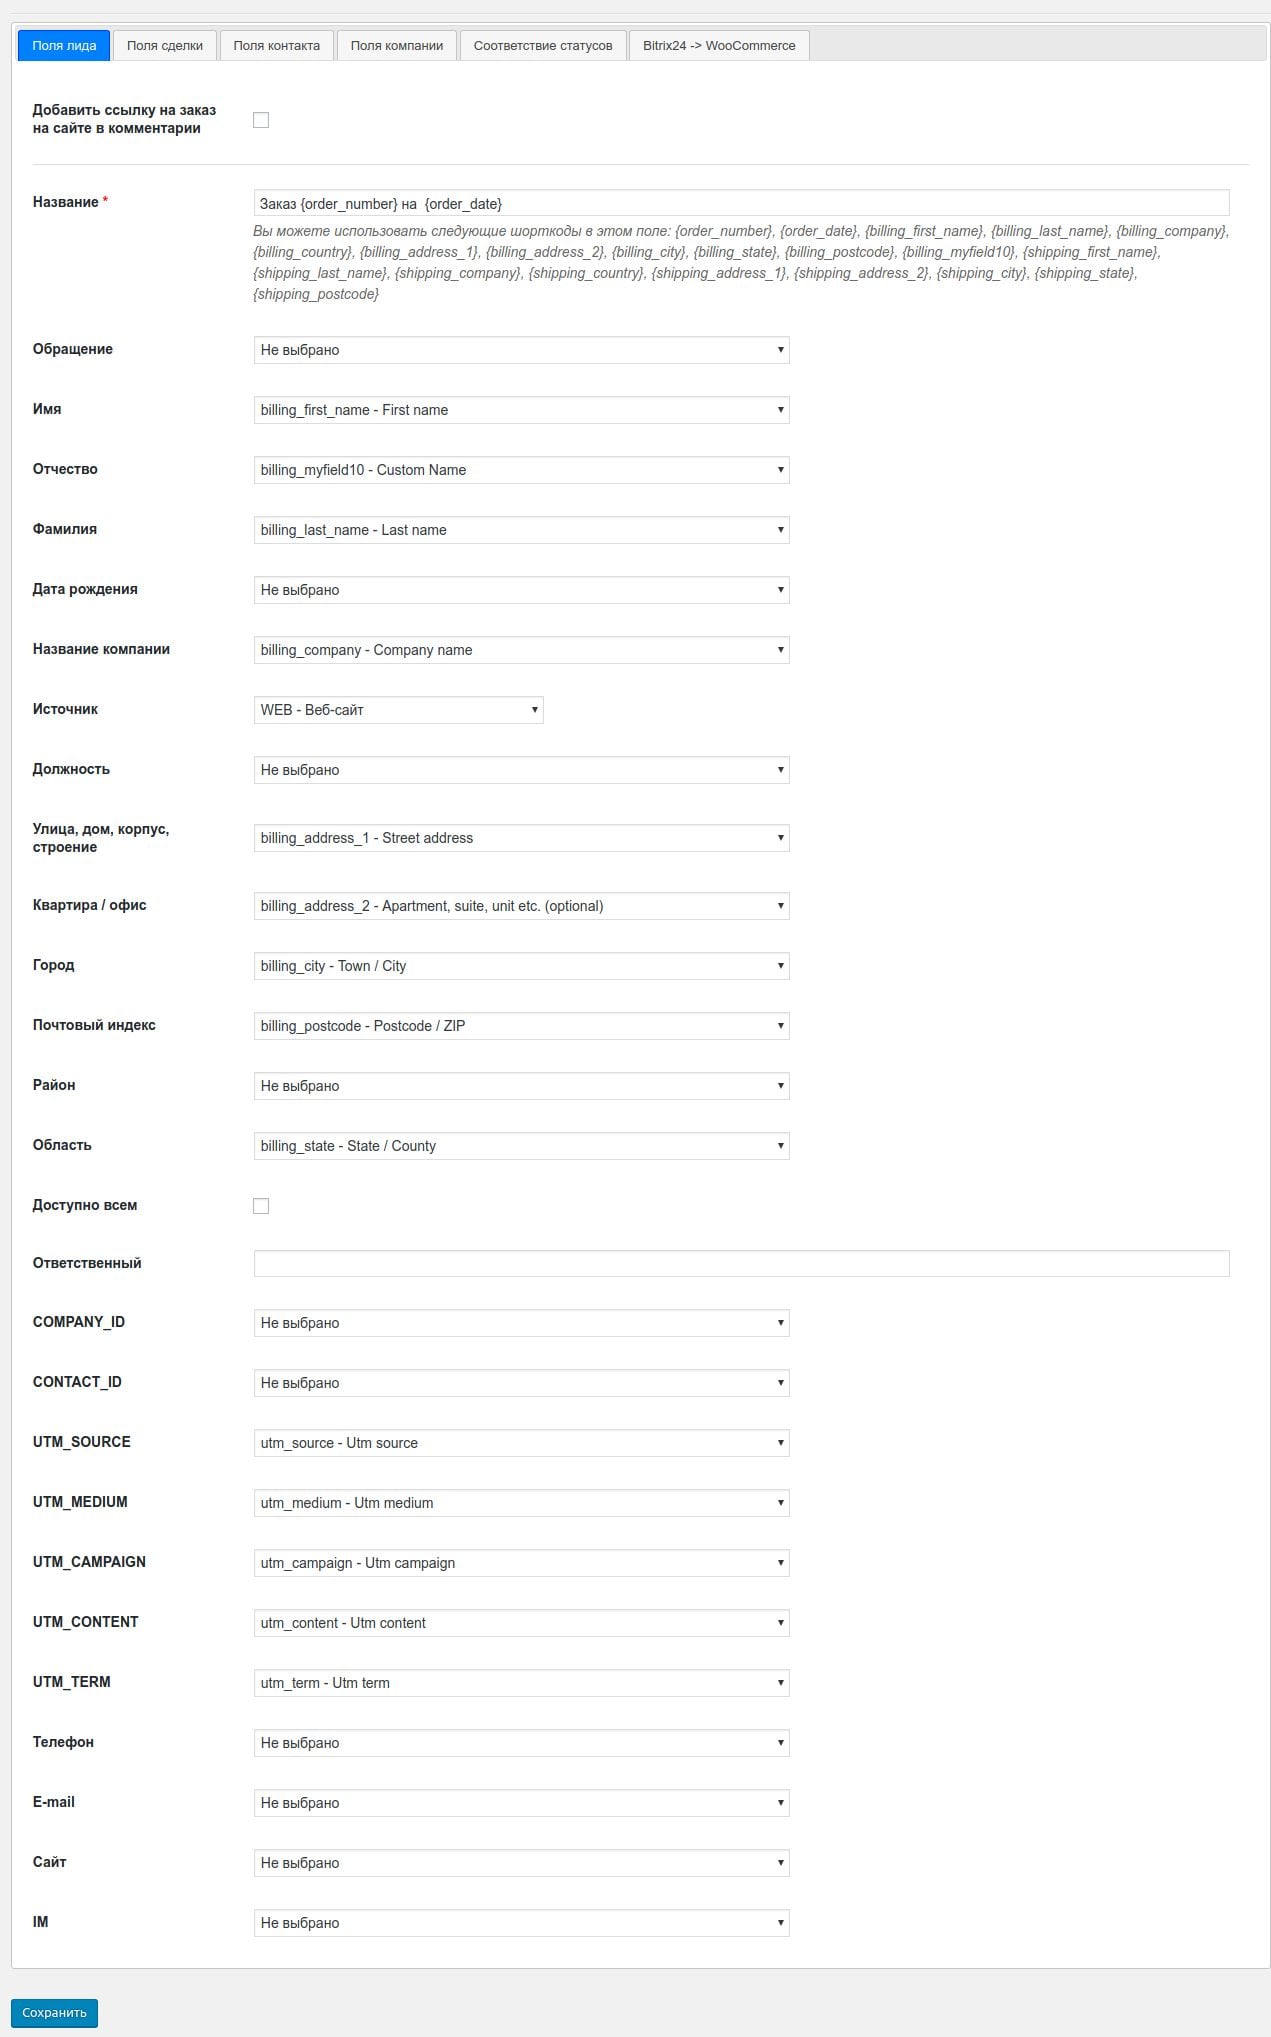
Настройте тип, поля и соответствие статусов.
Сохраните настройки.
Дополнительная информация
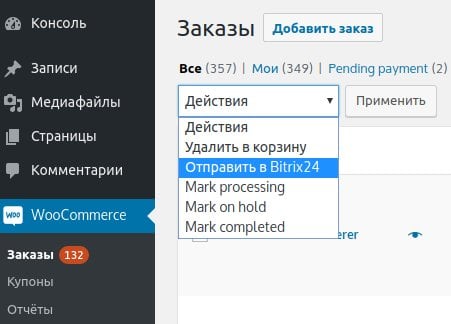
Ручная массовая отправка. Может использоваться, например, для отправки старых заказов, если это необходимо.
Что можно указывать в поле ответственного?
В поле `ответственный` нужно указать идентификатор пользователя Битрикс24, то есть номер.
Узнать ID пользователя можно, перейдя на страницу профиля пользователя, например, ссылка на профиль выглядит https://domain.com/company/personal/user/5/, идентификатор пользователя в конце и в данном случае = 5.
Настройка получения изменений статуса заказа из CRM (через Исходящий вебхук)
Информация и настройки плагина.
Перейдите в ваш `Bitrix24` -> `Разработчикам`. https://your_bitrix24/devops/
Нажмите `Другое` на вкладке `Готовые сценарии`.
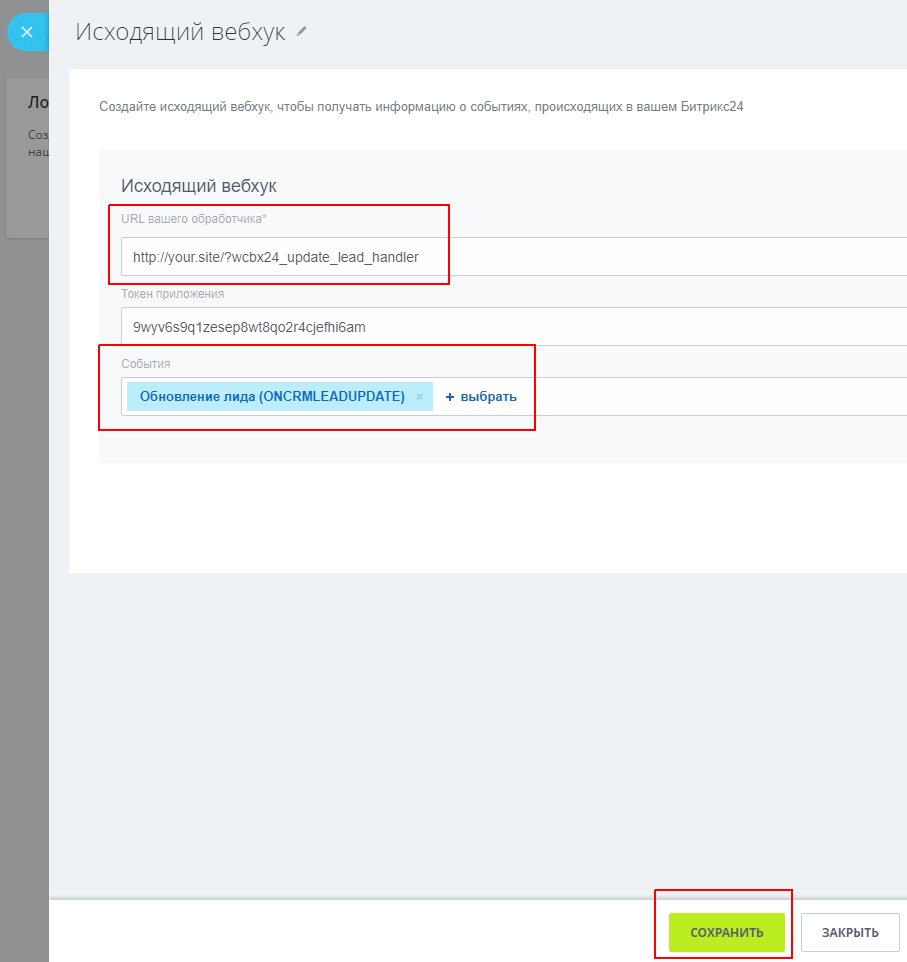
Нажмите `Исходящий вебхук`.
URL вашего обработчика – Используйте ссылку с вкладки плагина.
События – выберите `Обновление лида (ONCRMLEADUPDATE) или Обновление сделки (ONCRMDEALUPDATE), в зависимости от того, используете вы сделки или лиды.
Пример настроек для лидов
Скопируйте значение из `Токен приложения`. Нажмите кнопку `СОХРАНИТЬ`.
На этом действия в Bitrix24 завершены.
Вернитесь в настройки плагина и вставьте в поле `Исходящий вебхук (Токен приложения)` скопированное значение и сохраните настройки.


